


The fastest, safest fix is to reshape your hat while it’s still slightly damp. That window, the short stretch after washing or getting caught in the rain, is when fibres are pliable enough to move without cracking or tearing. Once a hat dries fully out of shape, the same repair becomes far tougher.
Three rules decide whether this works:
- Felt and straw hats respond to brief steam plus hand moulding over a rounded form.
- Synthetics and hats with glued brims should skip steam entirely and rely on stuffing or dry-shaping methods instead.
- Stop and call a milliner if you see split straw, a detached sweatband, or stiffeners that have come unglued. No amount of steam fixes structural failure.
Get those three calls right and you’ll restore hat form on most everyday caps and felt hats without buying a single tool.
Key Takeaways
Restoring hat form works best when you act while the hat is still slightly damp, match your method to the material, and give the shape time to cure undisturbed.
| Point | Details |
|---|---|
| Act while damp | Reshape within the damp window after washing or rain, since dry deformation is much harder to reverse. |
| Match method to material | Use steam for felt and straw; use stuffing or misting for synthetics and glued brims. |
| Keep steam distance and timing tight | Hold steam 6 to 8 inches away in 3 to 5 second bursts, checking pliability between passes. |
| Cure fully before wearing | Allow 2 to 4 hours for light fixes and up to 24 hours for steam or deep crease repairs. |
| Choose a durable build for next time | Plaid Gorilla Golf’s stitched-seam snapbacks and rope hats resist the warping and glue failures this guide addresses. |
Table of Contents
- How do I identify my hat’s material before I try to reshape a hat brim?
- What’s the safest way to reshape a hat with steam?
- How can you reshape a hat without a steamer?
- How do you fix a bent or wavy hat brim?
- How long should a hat dry after reshaping?
- When should you take a hat to a professional instead?
- Does the right fit reduce how often you need to reshape a hat?
- Looking for a hat that holds its shape without the fuss?
- Sources
- FAQ
How do I identify my hat’s material before I try to reshape a hat brim?
Guessing wrong here is how a $40 cap turns into a $0 cap. Felt has a slight nap you can brush in one direction; wool felt springs back when pinched, while cheaper felt blends stay dented. Straw is stiff, slightly rough, and smells faintly earthy when warm. Cotton and synthetic blends (the material in most snapbacks and trucker hats) feel smooth and show a woven texture under the brim.
Construction matters just as much as fabric. Run through this quick check before touching steam or water:
- Check the sweatband. A sewn band tolerates gentle moisture; a glued band can loosen or peel if it gets too wet.
- Flex the brim gently. If it bends with a slight crackle, there’s likely a cardboard stiffener inside. If it flexes smoothly with no sound, it’s probably plastic or buckram.
- Look for glue lines along the underside of the brim edge, where flat-brim caps and structured golf hats often hide adhesive.
- Inspect the crown seams for fraying or looseness, a sign the hat has already been reshaped roughly before.
Modern ball caps frequently use plastic brim inserts, but older or budget hats often rely on cardboard, which warps or delaminates when soaked. That distinction changes your entire approach: plastic tolerates a bit of dampness, cardboard does not.
Pro Tip: Test any moisture or steam on the underside of the brim or an inside seam first. If the colour bleeds, the material puckers, or you smell glue softening, stop before you touch the visible outer surface.
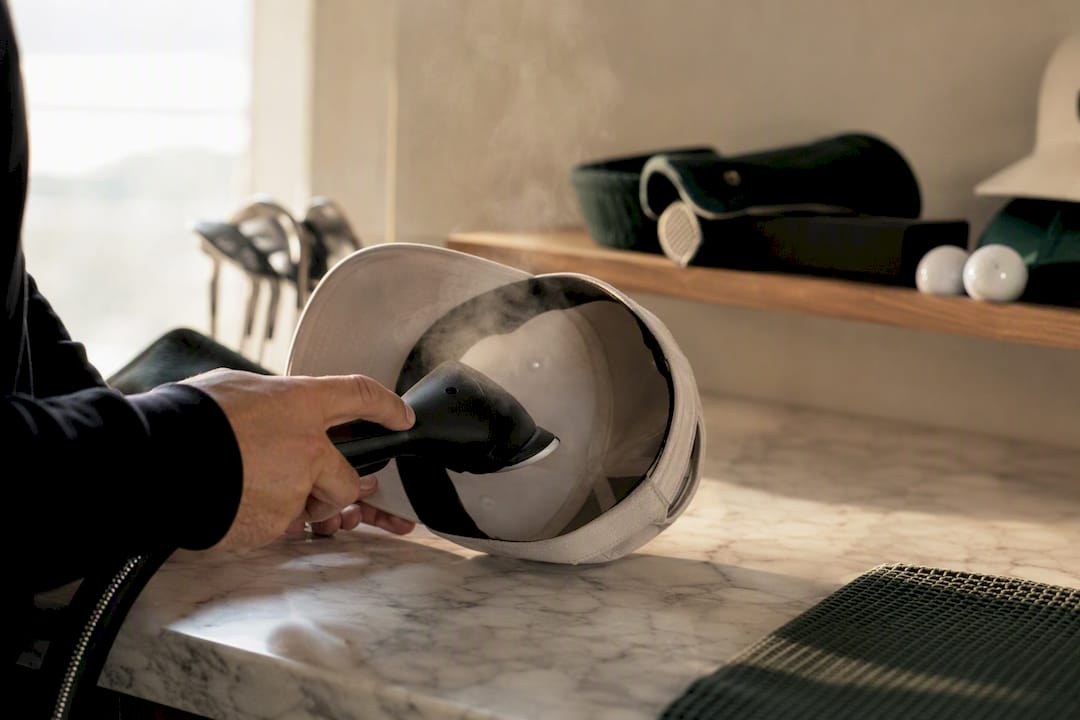
What’s the safest way to reshape a hat with steam?
Steam is the most reliable method for felt and straw hats, but it rewards precision over enthusiasm. Rushing this step is the number one reason people scorch felt or oversaturate a brim.
Gear checklist:
- A handheld garment steamer (preferred) or a kettle with a controlled spout as a backup.
- A clean towel to catch drips.
- A rounded hat form, wooden hat block, mixing bowl, or tightly balled towel sized slightly larger than your target fit.
- Oven mitts or a folded cloth if you’re using a kettle, since the spout gets hot fast.
Handheld steamers give tighter directional control than a kettle, and millinery-style workflows favour them for exactly that reason. A kettle works, but you’ll have less accuracy over where the steam actually lands.
The workflow:
- Hold the steamer 6 to 8 inches from the felt or straw. Any closer risks scorching or over-wetting one spot.
- Apply steam in short bursts of 3 to 5 seconds, moving constantly rather than hovering.
- Pinch or press the steamed section between your fingers. It should feel soft and pliable, almost like warm dough, before you attempt to shape it.
- For the crown, push outward from the inside to restore the dome, working in a circular pattern so you don’t create a lopsided bulge.
- For the brim, work in sections rather than all at once, curving or flattening a few inches at a time and checking symmetry as you go.
- Repeat steam and mould passes until the whole hat matches on both sides.
Here’s the part most people miss: steamed fibres cool and start re-stiffening almost immediately. Once felt or straw releases from steam, you’ve got roughly 20 seconds before it begins locking back into whatever position it’s sitting in, so decide your shape before you steam, not after.
Once you’ve got the shape you want, place the hat on its form and leave it. Millinery-grade curing calls for at least 24 hours before the hat is handled or worn again. Pull it off the form early and the fibres, still slightly relaxed, will slump right back toward their old shape.
Pro Tip: Never aim steam directly at synthetic fabric, plastic brim inserts, or glued seams. Those materials can warp, bubble, or melt under heat that felt handles just fine. When in doubt, test an inconspicuous patch first.
How can you reshape a hat without a steamer?
Not every hat calls for steam, and not every household has one lying around. These methods use tools you already own, and they’re often the better choice for synthetic caps and structured golf hats where steam is genuinely risky.
- Hot water, briefly. Dip the crown area in hot (not boiling) water for a few seconds, no full submersion, then hand-mould immediately over a bowl or form. Structured caps with glued interiors should skip full soaking altogether, since adhesive holding internal stiffeners can dissolve if it sits in water too long.
- The mug or softball trick for bills. Slide a curled brim over an upturned coffee mug or a softball, secure it loosely with a rubber band or clips, and leave it overnight. This resets the curve without stressing the stitching the way hand-bending repeatedly does.
- Stuffing and clamping for the crown. Pack the crown lightly with tissue paper or a rolled towel to push it back to round, then let it sit undisturbed while the fibres dry into that shape.
- A light mist instead of full moisture. A fine spray bottle followed by hand shaping works well for structured cotton and blends. Gentle misting and hand moulding, then setting the shape with books, clips, or stuffing for 12 to 24 hours, consistently outperforms soaking the whole hat.
Pro Tip: Always spot-test any spray, mist, or fabric treatment on a hidden interior seam first. Some synthetic dyes react to moisture with faint discolouration you won’t notice until it’s too late to fix.
How do you fix a bent or wavy hat brim?
Brim repairs live and die on what’s inside them. Before you flatten, curve, or steam anything, figure out whether you’re dealing with cardboard, plastic, or a wire insert, because each one has a different failure point.
- Cardboard-core brims need the driest possible approach. A light steam pass followed by flattening under a heavy book or between two boards works better than any wet method, since cardboard swells and delaminates once it absorbs moisture.
- Plastic-core brims tolerate a bit more. Brief steam plus a curved form (the mug trick from the previous section) usually restores a proper curve within a few hours.
- Wire-core brims, common on some structured golf hats and wide-brim styles, can be gently bent by hand into a new curve and held with clips while the surrounding fabric sets.
For deep, stubborn creases that won’t release with a single pass, staged blocking works better than forcing the shape in one go. Steam a little, mould a little, pin it in place, then let it dry slowly before repeating. If you notice the brim edge fraying, the glue line separating further, or the material cracking rather than bending, that’s your signal DIY has hit its limit.
How long should a hat dry after reshaping?
Curing time isn’t optional. Pull a hat off its form too early and it slides right back toward the shape it just left, undoing your work in an afternoon.
- Light treatments (a quick mist, minor hand-shaping) need roughly 2 to 4 hours before the hat can be handled normally; for best results, follow these detailed wash and wear tips for Hawaiian shirts that also highlight timing considerations for fabric drying.
- Heavier treatments (steam sessions, hot water contact, deep crease removal) need overnight to 24 hours minimum.
- Support the shape while it dries. A hat stand works best for crowns; a mixing bowl or tightly balled towel is a solid substitute. Air-drying over a rounded object keeps the dome intact while fibres set.
- Orient the brim correctly. If you curved the brim, prop it so gravity supports the curve rather than fighting it.
- Store it standing up, never stacked. Stacked hats flatten crowns fast, and direct sunlight fades colour and dries out felt and straw fibres unevenly.
- Stuff the crown lightly during storage with tissue paper if you’re not using a form, and keep the hat in a hat box or on a rack rather than shoved on a shelf.
When should you take a hat to a professional instead?
Some damage isn’t a DIY problem, and forcing it usually makes things worse. Watch for these signs:
- Split or crumbling straw fibres that flake apart rather than bending.
- Bent or broken wire framing inside the brim, especially on structured wide-brim hats.
- Severely shrunk felt from a hot wash or dryer cycle, where the hat no longer fits regardless of how much you steam it.
- A detached lining or sweatband pulling away from the shell.
Professional milliners offer reblocking (resetting the entire shape on a proper hat block), rewiring brims, and sweatband replacement. Expect to pay more than a DIY attempt costs in time, but a milliner can rebuild structural elements that no amount of home steaming will fix. If you’re transporting a damaged hat, pad the crown with tissue paper, keep it in a rigid box, and bring reference photos of its original shape so the repair matches what you’re after.
Does the right fit reduce how often you need to reshape a hat?
A hat that fits properly to begin with needs far less reshaping over its lifetime. Most deformation starts with a hat that was slightly too tight or loose, forcing the wearer to bend the brim or crush the crown just to make it sit right. Plaid Gorilla Golf’s hat sizing guide walks through measuring your head properly and adjusting for snapback versus fitted builds, which cuts down on the kind of daily stress that leads to warping.
Construction quality plays into this too. Snapbacks and rope hats built with sturdier crown structure and cleaner stitched (rather than glued) seams tend to hold their form longer between reshaping sessions. Readers curious about how fabric choice affects fit over time can check the adjustable hats guide for a breakdown of how construction and material work together.
- Correct sizing reduces the bending and forcing that causes most brim damage.
- Stitched seams generally outlast glued ones under repeated handling.
- Rope hat crowns hold shape better than soft, unstructured caps left in a bag or car.
Looking for a hat that holds its shape without the fuss?
If your current hat is past saving, or you’re just tired of babying a cap that won’t hold its curve, Plaid Gorilla Golf builds hats with construction that resists the exact problems this guide walks you through. Snapbacks and rope hats made with sturdier stitched seams, rather than glued stiffeners, don’t demand the same steam-and-pray routine every few months.
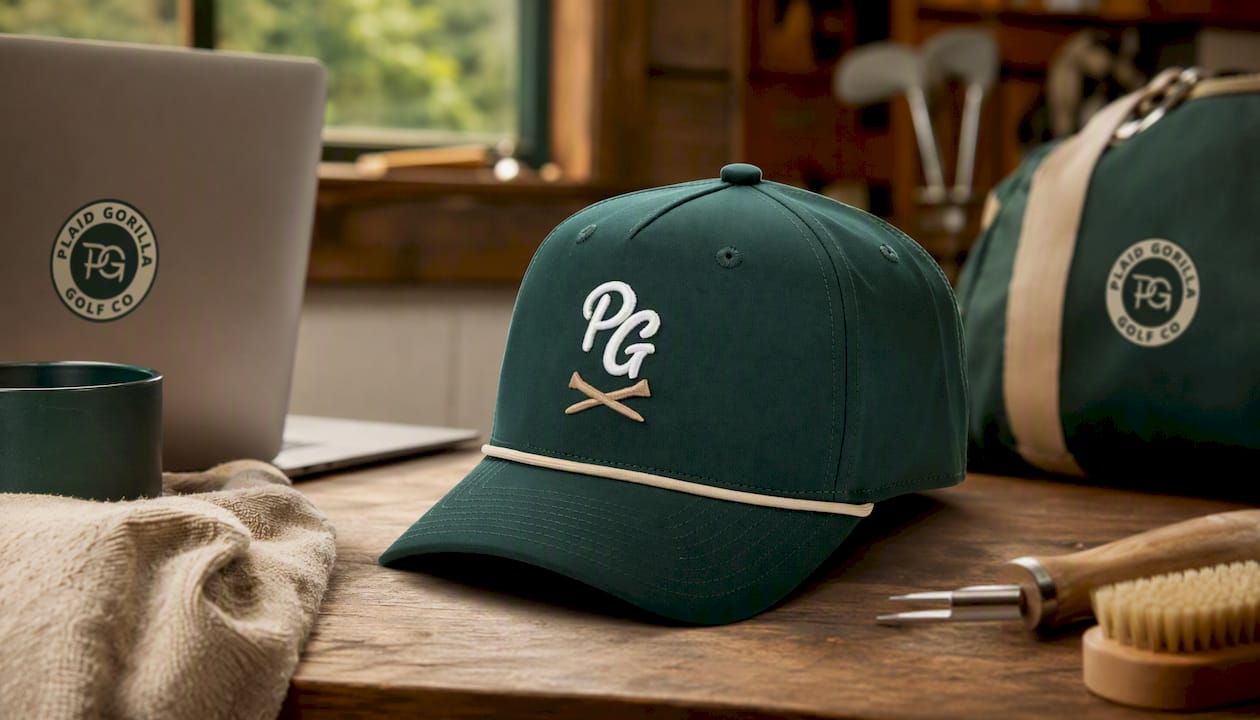
The Country Club Snapback in Navy/Cloud White uses a structured crown that keeps its dome through regular wear, while the Champagne Tees Rope Hat in Ponderosa Pine trades the flimsy weave you’ll find on budget rope hats for a tighter build that resists the wavy-brim problem covered above. If you’d rather bundle a hat with a hoodie, The Bogey Kit — Country Club Hat & Bogey Enthusiast Hoodie and The Course Kit — Rope Hat & Prime Hoodie both pair a durable hat with matching apparel from the same limited drop.
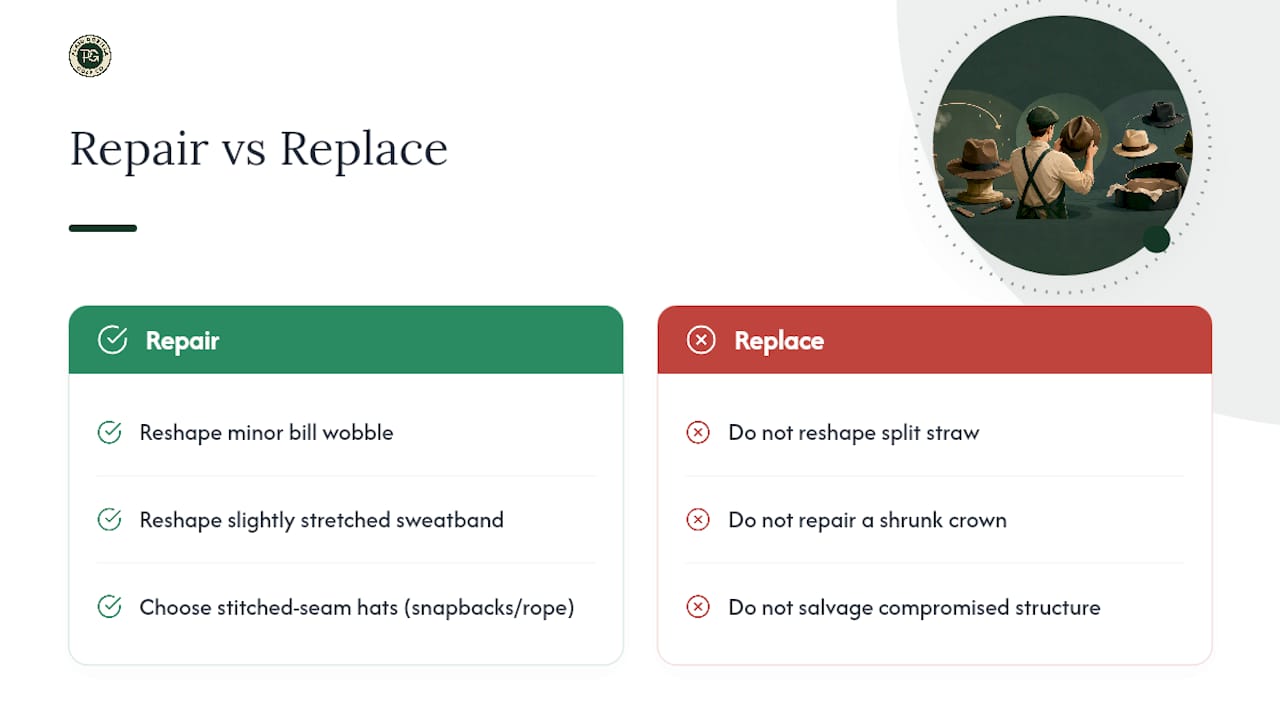
For readers weighing repair against replacement, a hat with minor bill wobble or a slightly stretched sweatband is worth reshaping using the steps above. A hat with split straw, a shrunk crown, or a compromised structure is better replaced outright. Browse The Club Kit — Country Club Snapback & Prime Hoodie or The Ponderosa Pine Set — Rope Hat & Bogey Enthusiast Hoodie to see the current build quality for yourself, and place an order if you’re ready for a hat that won’t need this guide again.
A note on patience before you commit
Start gentle and test hidden areas before touching the visible parts of your hat. Small, incremental adjustments beat one aggressive pass, and a bit of natural wear and patina is honestly part of a hat’s character.
Sources
For deeper technique breakdowns, GQ’s guide to washing hats covers gentle cleaning before reshaping, Hoffman Steamers details professional steam workflows, WikiHow offers accessible no-tool alternatives, and Laird Hatters explains millinery-level crease and brim repair.
- How to Wash Your Hat (Without Ruining It) | GQ
- How to Shape a Hat With Steamer: Pro Workflow 2026 - Hoffman Steamers
- Which 10 step-by-step methods remove deep creases and restore a hat’s brim and crown – Laird Hatters
- Hat shaping tips | Gentleman’s Gazette
FAQ
Can you fix a misshapen hat?
Yes, most felt, straw, and cotton hats can be reshaped at home using steam or damp moulding, provided the material hasn’t split, cracked, or lost its structural glue. Severe damage, like broken wiring or crumbling straw, usually needs a professional milliner instead.
How do I fix the shape of my cap?
Lightly mist the crown and brim, mould it by hand into the shape you want, and hold that shape with stuffing, clips, or by setting it over a bowl or form for 12 to 24 hours. Avoid full submersion on caps with glued brims or internal stiffeners.
How do you reshape a hat without a steamer?
Use a brief hot water dip on the crown, curve the brim over a mug or softball overnight, or lightly mist and hand-mould the fabric before letting it set on a form. Each method needs several hours of undisturbed drying to lock the new shape in.
My hat lost its shape after washing. How can I fix it?
Reshape it immediately while it’s still damp rather than waiting for it to dry, since the damp window is your best chance at restoring the original form. Mould the crown over a rounded bowl or hat stand and let it cure fully before wearing it again.
Do Plaid Gorilla Golf hats need reshaping often?
Plaid Gorilla Golf’s snapbacks and rope hats use stitched seams and sturdier crown construction, which hold their shape through regular wear better than glued or unstructured builds. Proper sizing from the brand’s fit guide also reduces the bending that leads to warping over time.